Showing posts with label Bathrooms. Show all posts

Friday, September 9, 2011

Bathroom vanities for smaller sized bathrooms by Nameek

Posted by MAKMU ta On Friday, September 09, 2011

The Luna Set L16 and Set L15 bathroom vanities by Nameek’s are clean, complete, and available in four different colors and sizes. The ones shown in the images are Gray Oak and Teak, but the vanities are also available in Glossy White, and Wenge. The width of the vanity ranges from 18.6″, perfect for smaller sized bathrooms, to 38.3″ - each with a depth of only 15″! Each vanity comes with a fitted sink and matching medicine cabinet or mirror, as well as a light. The vanities can be wall-mounted or floor standing (hoisted by a kit of chrome feet), depending on preference. Additional options include storage cabinets, tall or short. For those of you who would like to buy these bathroom vanities you can find more info about them from here and here.


Saturday, August 27, 2011

Romantic Bathrooms designs

Posted by MAKMU ta On Saturday, August 27, 2011


Gold-hued glass tiles line the wall in a women's bath makeup area. A hand blown glass mirrror and wall sconces were imported from Italy to add a elegance to the space. The walls were treated with a gold luster Venetian plaster for texture and visual interest. The gilded stool and cherry console provide a glamorous spot for any women to use.


This red vessel sink sits a top a tumbled travertine counter top. The warm red walls complement the sink and add an element of surprise in this powder room. The walls are embellished by a gold leaf Modello design. Photograph by Cynthia MacDonald.


This oversized Jacuzzi tub was placed in front of the picture window to take advantage of the view. The window is adorned by a silk window treatment. The neutral fabric was purposely chosen so as to not compete with the view. Photograph by Cynthia MacDonald.


This powder room uses the same color glass tile, which is sandblasted on the lower half and glossy on the upper half. A cast concrete sink and a stainless steel toilet complete the elegant look.


A posh Paris hotel spa was the inspiration for this master bathroom. The furniture-style cabinets are a replication of French country cabinetry prevalent in the south of France during the 18th century. A stunning wall of candle niches offers pockets of glowing light. The therapeutic benefits of chromotherapy have been incorporated through lighting in the tub and shower areas. Piped-in music and a flat screen television mounted behind a tempered two-way mirror complete the experience. Photography by Ric Marder.

Sunday, August 21, 2011

Modern Bathrooms Decorating Designs Ideas 2011 by Candice Olson from HGTV

Posted by MAKMU ta On Sunday, August 21, 2011

Modern Luxury

Glass mosaic shower tiles and marble floor tiles lend a watery theme to the bathroom completed in restful hues of blue and green. Modern sconces and recessed cans allow for ambient and task lighting, while a skylight illuminates the soaker tub and frameless shower enclosure. Mirror-mounted faucets add an ultra-contemporary finishing touch to the space.

Show-Stopping Bathroom

To create a modern, boutique-hotel vibe, Candice injects the bathroom with a palette of grays, blues and pure snow. Elements, like the ceiling mural, stainless steel chain window treatment and gray and white mosaic-tiled wall, are pieces of art while also adding function and personality to the space. 

Spa-Like Retreat

A watery-green palette sets the tone for this relaxing bathroom, which features a soaker tub and glass steam shower. The same marble mosaic tiles used in the shower is carried over to the sink's backsplash, adding color to the rich mahogany cabinets and white quartz countertops.

Suite Getaway

In this 100-year-old row house, Candice creates a loft master suite full of modern amenities and high-end finishes. A glass-enclosed shower complete with solid white quartz walls and a green-tiled feature wall is paired with a stylish vanity and quartz countertops.

Streamlined Elegance

Cool, clean colors, modern fixtures and smart yet stylish storage combine to create a refreshing, luxurious bathroom. The frameless glass enclosure of the walk-in shower keeps the space light and airy while separating it from the deep soaker tub.

Tuesday, April 26, 2011

Accessorize the Bathroom

Posted by MAKMU ta On Tuesday, April 26, 2011

What a difference a few little accessories can make!

 
BEFORE
The vanity used to be golden oak, it was painted expresso
brown at the same time the kitchen was. 

A very nice update.

AFTER
Add just a couple of items. 

1. The little tree on the back of the toilet is a nice natural element.
2. The antique white cabinet door with a mirror and the little china plate really adds some personality. (you will notice she has this theme going throughout her whole house)
3. The tray on the counter has a hand towel in the same color as the shower curtain, with a few glass jars filled with cotton balls and qtips.

See how these little accessories really do add the touch
to make the room feel cozy!


Sunday, April 10, 2011

A Home Tour

Posted by MAKMU ta On Sunday, April 10, 2011

I am so excited to have a lot of new readers, so I thought I would take you all on a little tour of our home.  So far, I have shown you most of the rooms in our house, but I'm holding out on showing you our third floor (playroom and guest room) because I still need to finish up some projects up there.  It won't be long.

Let's get going.  I'll start with the front of the house.  Be sure to check out the before pictures here.


Come on into the foyer.  Before pictures here. 


Off the foyer is the new and improved powder room. Before pictures here.


To the right of the foyer is the casual living room. This room has come a long way. Check out the before pictures here. 


Just off the living room is the office/den.  This room has become one of our favorite hang out spots.  See before pictures here.


These built-ins were already here, we just revamped them a bit.


Through the foyer, in the heart of the home, is the kitchen and dining room.  These two rooms got complete makeovers. See before pictures here.  


More before pictures here. 


Off the kitchen is the mudroom and pantry.  This room was previously a sun porch on the end of the house.


Having this space helps keep our family organized.


The pantry is a huge help with storage.


Just off the kitchen/dining room is the gathering place, our family room.  Before pictures here. 


The fireplace got a facelift as well.


This ceiling is one of my favorite features in our home. 


We spend a lot of time in this room, specifically gathered around this table, playing games, coloring, eating popcorn and building legos.


Now, let's head upstairs.

This is the master bedroom.  Before pictures here.


Down a little hall in the master bedroom is the master bathroom which was previously a small bedroom.  Before pictures here.


My daughter's room is across the hall.  It was formerly the master bedroom.  Before pictures here.


A small, but full bathroom is located off her bedroom. Before pictures here.


My boys' room is just down the hall.  It has quite a story behind it.  You can read all about it here.


Right next to their bedroom is bathroom they share.  Before pictures here


Hope you enjoyed the tour.  I am linking up to Poppies at Play Parade of Homes Party today.  Go on over and check out all the lovely homes.

Also, check back Monday night for my very first giveaway! I'll have all the details for you then.

Friday, April 8, 2011

Painting Tile

Posted by MAKMU ta On Friday, April 08, 2011

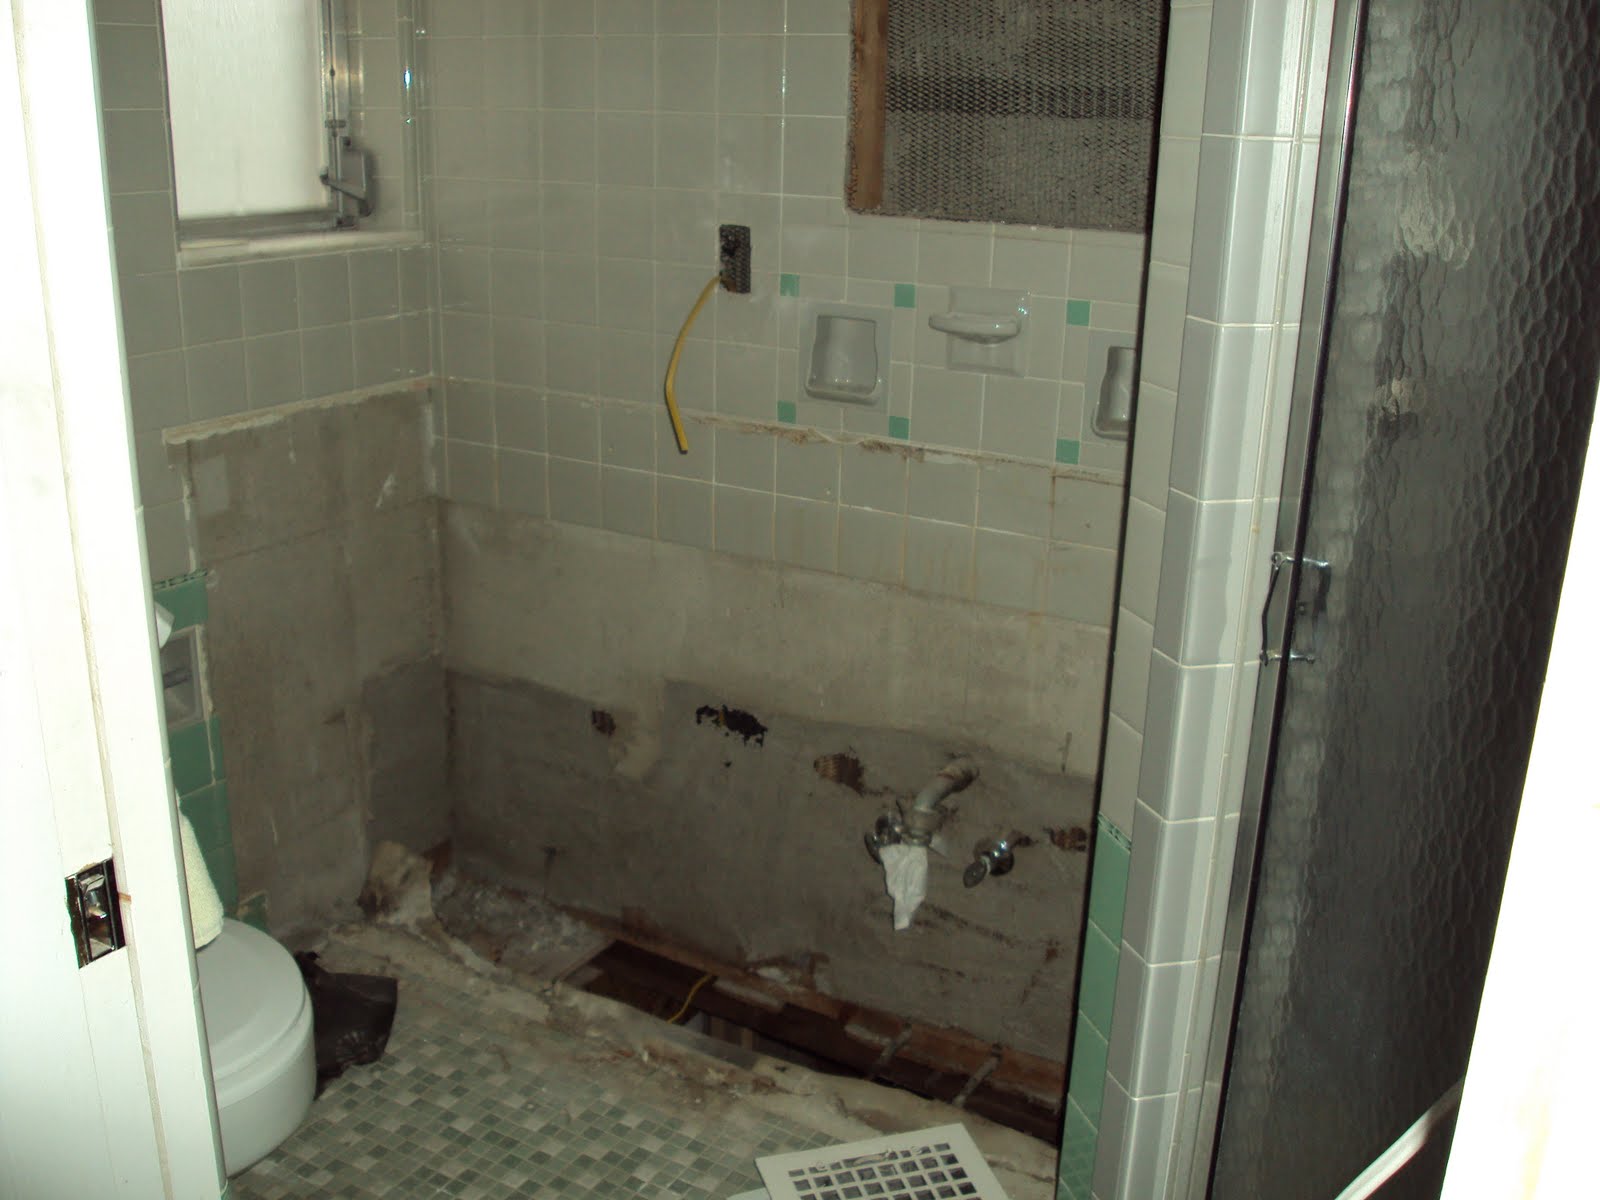
I have gotten several e-mails about the painted tile in my daughter's bathroom so I thought I would give some details about the process.  When we bought our house, there was so much work that needed to be done that the thought and cost of gutting the two existing bathrooms was more than we could handle.   Fortunately, our architect, Ashli Slawter, suggested some simple and inexpensive ways to update the bathrooms without having to gut them.  One of her suggestions was to paint the gray and green tile in my daughter's bathroom.  


Once I convinced my painter to tackle this project, we were in business.  The first thing they did was to lightly sand the tile.  Next they thoroughly cleaned the tile.  The tile was then sprayed with a Sherwin Williams adhesions primer like this one. 

Up until this point, everything was going very smoothly.  The next step was to spray on the paint.  Our painter used a Sherwin Williams latex paint for the next two coats.  The first coat was sprayed on and then everyone left for the day.  I came over that evening to check on everything and was not happy with what I saw.  The paint was running down the wall in quite a few places.  I completely over-reacted and called our contractor in a panic.  The next morning the painter showed up and they had to re-sand the spots where the paint had run.  Another light coat of paint and everything was looking much better. 


This is how the bathroom looks now.  


Here is a picture of how smooth the paint looks after being sprayed on.  


This is a picture of a spot on the wall where the painting is not perfect.  You have to look very closely to notice.

Here is a close up of the tile that was previously two different colors.  Above the border, the tile was gray and below the border the tile was green.  You can't tell now, right?


I was holding up the mirror to make sure it was going to fit and I dropped the corner of it and it scrapped a bit of the paint off the wall. The mirror was heavy and hit the wall pretty hard.  That is the only place where the paint has chipped. 


This is how the bathroom looked before we bought the house.  Most of the tile was gray and there was a green tile border at the top and bottom. 


Here is a lovely picture of the bathroom all torn up and waiting to be put back together.


And one more time, this is how the bathroom looks now. 


It is not recommended that you paint tile that gets wet repeatedly.  Only the tile walls in my daughter's bathroom were painted.  The gray tile in the shower was left alone.   


I am certainly not an expert on painting tile, but hopefully you found this information helpful.  

Lastly, as a little reward for my faithful followers, I will be announcing a great giveaway on Monday.

Be sure to stop by on Monday for all the details.  Enjoy your weekend!

Related Posts Plugin for WordPress, Blogger...